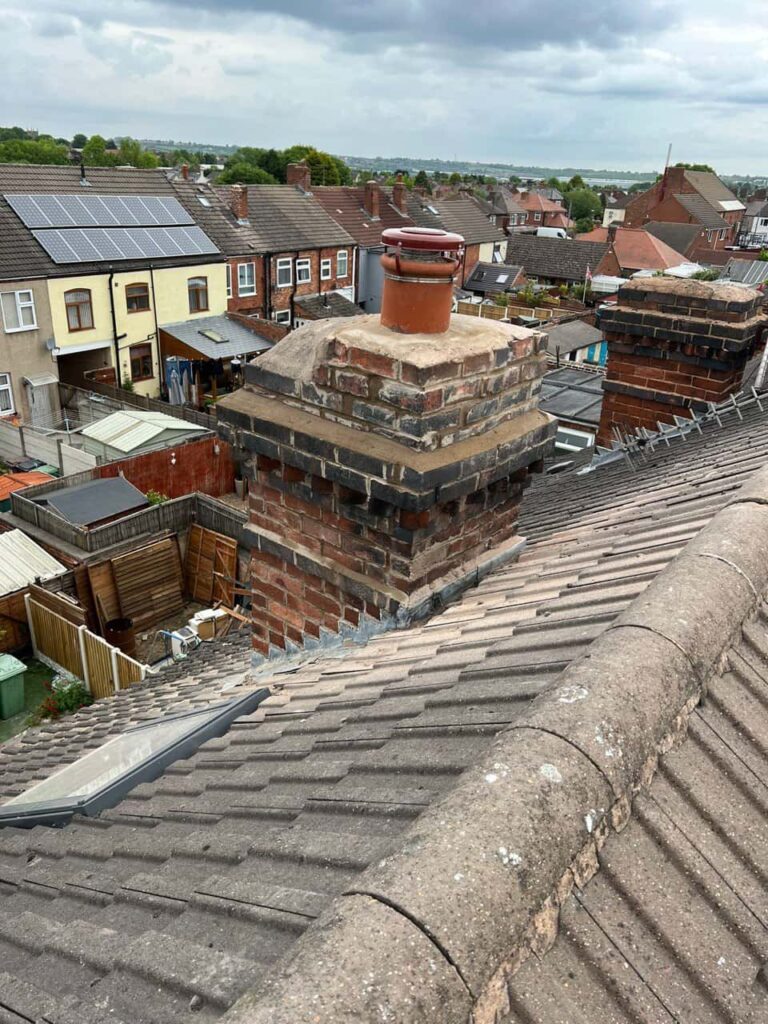
A roof leak can be difficult to trace because the place where water becomes visible is not necessarily where it entered the roof. Moisture may travel along underlay, battens, rafters or other components before dripping into the loft or marking a ceiling below.
Finding a hidden roof leak therefore requires more than inspecting the area directly above the damp patch. An experienced roofer will assess the roof systematically, following the likely path of the water and examining the components most capable of allowing it into the property.
How Professional Roof Leak Detection Works
Effective leak detection combines information from inside the property with a detailed inspection of the external roof. The objective is to identify the original entry point, determine why it has failed and establish whether surrounding materials have also been affected.
A methodical approach reduces the risk of repairing the visible symptom while leaving the underlying defect unresolved.
Reviewing When and Where the Leak Appears
The investigation often begins by gathering information about the leak. When the dampness appears can provide useful clues about its cause.
A roofer may consider:
- Whether the leak occurs during heavy or prolonged rain
- Whether wind direction affects the problem
- How quickly moisture appears after rainfall begins
- Whether the damp patch is growing or changing position
- Whether the problem is intermittent or continuous
- Whether it is close to a chimney, valley, rooflight or external wall
A leak that appears only during wind-driven rain may indicate a different defect from one that develops gradually after several hours of rainfall.
Inspecting the Roof Space
Where access is possible, the internal roof space can reveal signs that are not visible from outside. Darkened timber, damp insulation, water marks and staining on the underside of the roof may help establish the route taken by moisture.
The roofer may trace these signs upwards towards the highest wet point. Although this does not always reveal the exact entry location, it can narrow the search to a particular roof slope or junction.
Older staining must be distinguished from active moisture. Otherwise, a historic mark could divert attention away from the current defect.
Examining Tiles and Slates Carefully
A tile or slate does not need to be completely missing to allow water through. Fine cracks, slight displacement and worn fixings can create small openings that are difficult to see from ground level.
A close inspection can identify:
- Slipped or uneven roof coverings
- Hairline cracks
- Broken corners
- Enlarged fixing holes
- Gaps in tile overlaps
- Loose ridge or hip tiles
- Damage concealed beneath adjoining tiles
The surrounding area should also be checked. One displaced tile may be a symptom of deteriorated battens or fixings rather than an isolated problem.
Checking Lead Flashing and Roof Junctions
Lead flashing protects vulnerable junctions around chimneys, walls, valleys and other changes in the roof structure. Small splits, lifted edges or deteriorated surrounding mortar can allow water to pass behind the leadwork.
Because water entering at a junction can travel beneath several rows of tiles, the internal damp patch may appear well away from the fault. A roofer will inspect the entire detail rather than only the section closest to the visible stain.
Assessing Valleys, Gutters and Drainage Routes
Roof valleys carry concentrated flows of rainwater and are common sources of hidden leaks. Debris, damaged linings or poorly seated tiles may cause water to overflow into the surrounding roof structure.
Gutters and outlets should also be examined. Blockages, incorrect alignment or defective joints can force water beneath the roof edge or against adjoining materials. What appears to be a roof-covering problem may therefore originate from ineffective rainwater drainage.
Inspecting Roof Penetrations
Pipes, vents, rooflights and other penetrations interrupt the continuous roof surface. Each feature relies on seals, flashing or weatherproof collars to prevent water ingress.
These details can deteriorate gradually without leaving an obvious external opening. A professional inspection checks the complete perimeter of each penetration, including the materials above it, because water may run down the roof before entering through a weakened seal.
Using Moisture Patterns to Narrow the Search
Moisture meters can help distinguish actively damp materials from old, dry staining. Readings taken across a ceiling, wall or section of timber can indicate how far moisture has spread and where the concentration is greatest.
These findings must still be interpreted alongside the roof’s construction. Moisture readings alone do not identify the defect, but they can support a more targeted inspection and reduce unnecessary disturbance.
Carrying Out Controlled Water Testing
If the source remains unclear, controlled water testing may sometimes be appropriate. Water is applied carefully to selected external sections while the interior is monitored for signs of ingress.
The test should begin at a lower point and move gradually upwards, allowing enough time between sections to observe the results. Applying water across a large area at once would make it difficult to determine which detail is responsible.
This method is only suitable when conditions allow it to be performed safely and without increasing existing damage.
Ruling Out Condensation
Not all internal moisture comes from a roof leak. Condensation can form when warm, moisture-laden air reaches cold surfaces within a poorly ventilated roof space.
A roofer should consider the distribution of moisture, ventilation conditions and the timing of the dampness. Identifying condensation correctly prevents unnecessary repairs to an otherwise sound roof covering and allows the actual moisture problem to be addressed.
Confirming the Cause Before Repairing It
Once a likely defect has been identified, the surrounding materials should be inspected for related weaknesses. Replacing one cracked tile will not provide a lasting solution if damaged underlay, decayed battens or defective flashing are also contributing to the leak.
An effective repair should address the point of entry, reinstate the roof’s weather-resistant layers and ensure that water can drain correctly. Confirming the cause before work begins is one of the most important differences between a targeted repair and repeated patching.
Conclusion
A hidden roof leak is found by combining evidence from the internal damp area with a systematic inspection of the roof covering, underlay, flashing, valleys, drainage and penetrations. Moisture tracing and controlled testing may also help when the entry point is not immediately visible.
If you have unexplained dampness or a recurring roof leak in Hinckley, Leicestershire, Hinckley Roofing Repairs can assess the complete roofing system and identify the underlying cause. Contact the team to arrange a professional roof inspection.
Call us on: 01455 241 499
Click here to find out more about Hinckley Roofing Repairs
Click here to complete our contact form and see how we can help with your roofing needs.